JOURNAL 2013
Posted: October 17, 2013 Filed under: Home Studio, JOURNAL 2013, October 17 | Tags: Art Studio, Cyprus, Drawing, Dry Point, Engraving, Kalamazoo Gallery, Linda Rzoska, Ninth Wave Studio, Olive Tree, St. Francis of Assisi Leave a commentHome Studio: October 17th
I am currently enrolled in an online class with 426 other people from at least 15 different countries. The class subject is the study of the spirituality of St. Francis of Assisi. Growing up as a non Catholic I didn’t know much about St. Francis other than he seemed to like birds and you could buy statues of him to put into your garden. Then I discovered his teachings of the spirituality found in nature so I wanted to learn more. Below is a poem by St. Francis that we discussed in class last week.
The Sacraments
I once spoke to my friend, an old squirrel, about the Sacraments—
he got so excited
and ran into a hollow in his tree and came
back holding some acorns, an owl feather,
and a ribbon he had found.
And I just smiled and said, “Yes, dear,
you understand:
everything imparts
His grace.”
This poem struck a chord with me. The squirrel had his sacred items – his treasure – his connection to what is sacred in the world. I have a similar collection in my studio, bird’s nests (intricately beautiful and mysterious), feathers, sea shells, stones, hazel nuts, pine cones . . . all are mysterious beautiful and a testament to creation.
I have spent the last two days away from the studio. I injured my right hand by not protecting it enough when I was engraving with my dry point needle. My index finger went numb, it still isn’t fully back yet but it should be fine by tomorrow. I have some finishing touches to do on my plate and then I should be able to start printing tomorrow afternoon.
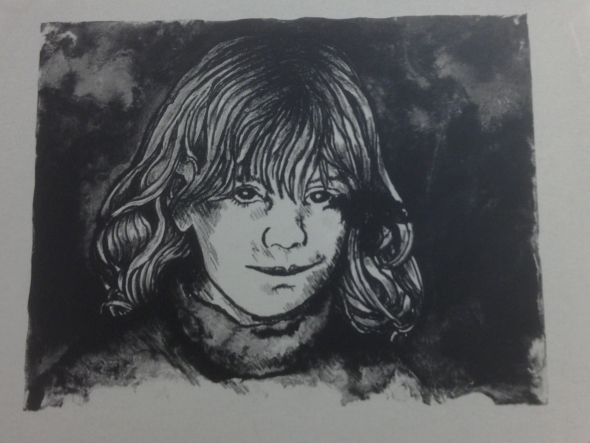
The drawing is of an Olive Tree which is one of many I photographed and have drawn from my time working in Cyprus this last February. I drew this one in ink in preparation for a Lithograph print, I decided to do a dry point engraving of it, as well.
JOURNAL 2013
Posted: October 16, 2013 Filed under: Home Studio, JOURNAL 2013, October 16 | Tags: Art Council of Greater Kalamazoo, Art Hop, Art Studio, Kalamazoo Art Hop, Kalamazoo Gallery, Linda Rzoska, Mary Louise Haynes House, Ninth Wave Studio Leave a commentHome Studio: October 16th
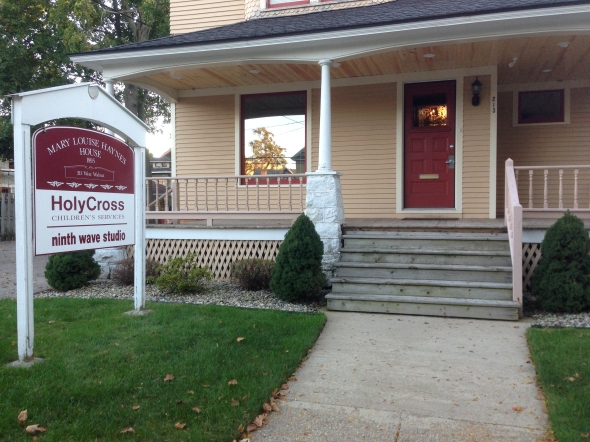
We now have a “ninth wave studio” sign up in front of the Mary Louise Haynes house and in this photo directly below you can see the new and improved front porch ceiling and canister lighting. Leszek also added lights to shine in the parking lot. The addition of the lighting was very helpful during the dark evening hours of the October Art Hop.
JOURNAL 2013
Posted: October 9, 2013 Filed under: Home Studio, JOURNAL 2013, October 9th | Tags: Etching Procedure, Linda Rzoska, litho, Lithography, Ninth Wave Studio, Roll-Up, Spot Etch Leave a commentHome Studio: October 9th
Last night I was able to do my second and third etch in my Lithography class at the KIA. As I was reading over my post from yesterday I realized I want to clarify the steps of the etching procedure. In my last post I gave an overview of what is applied during the etching process, below is a more detailed step by step process:
1. Talc is applied to the image and wiped off with a cotton wipe.
2. Gum Arabic is applied to the image with a brush and worked over the image for 2 minutes.
a. The Gum Arabic is wipe off with a damp sponge
b. The image is buffed down with cheesecloth
3. A mixture of Tannic Acid and Gun Arabic is applied to the image with a brush and worked over the image for 3 minutes.
a. The mixture is wipe off with a damp sponge
b. The image is buffed down with cheesecloth
Note: I used a mixture of 1 part Gum Arabic to 2 parts Tannic Acid for my second etch
4. Gum Arabic is applied again to the image with a brush and worked over the image for 2 minutes.
a. The Gum Arabic is wipe off with a damp sponge
b. The image is buffed down with cheesecloth
Before I did my second etch I wanted to try to remove a black blob that was under the right eye of the figure. In my last post I explained that water was accidentally splashed onto my plate which caused a black blob to appear. I was able to remove it by rubbing over it using a stone stylus before I started my second etch procedure.
The next thing that I needed to do is called the “Roll-Up”. This is where the image is removed and then Ink is rolled onto the image.
1. Wait 30 minutes after the plate is etched.
2. Lithotine is applied liberallyto the plate until the image is completely washed out
a. Several clean cotton paper towels are used to wipe off the residue completely (this is messy)
3. A small amount of Asphaltum is put on a clean cotton paper towel and applied to the plate and rubbed into the image
a. The image is buffed down with cheesecloth
b. The plate is washed over with a wet (damp) clean cotton paper towel
c. The excess water is wiped up with a damp sponge
Note: The Asphaltum creates a printing base for the Ink. I found it helpful to thin the Asphaltum a little with Lithotine.
4. The Roll-Up process follows immediately by rolling ink on the image with a ink brayer.
a. Ink is applied by briskly rolling the brayer over the image.
b. Between applications the image should be wiped with a damp sponge.
Note. Each application consists of about 6 brisk rolls of the brayer in various directions, with a total of about 6 separate applications.
I’m sorry to say that I didn’t think to take a photo of the image after the Asphaltum was applied.
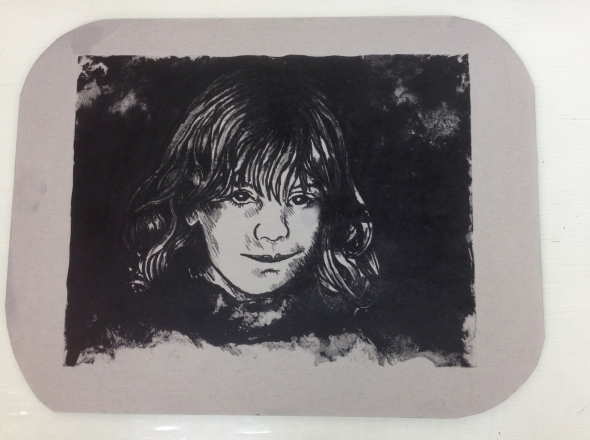
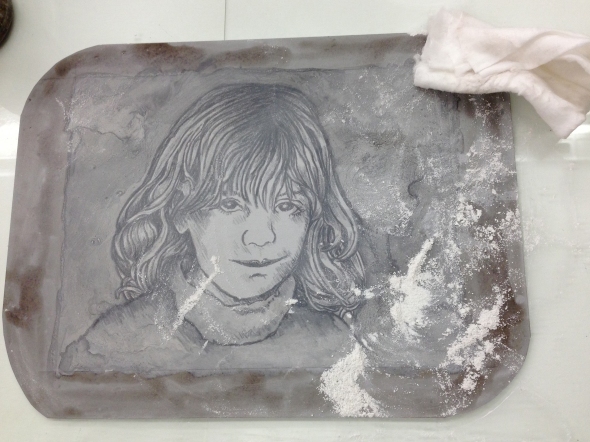
Because I altered the plate by trying to remove the black blob I needed to do a third etch. I modified the application procedure of the third etch by doing something called a spot etch. Basically that means applying the etching mixture to isolated areas on the image. I spot etched the background and the area under the right eye. After the etching mixture was moved around these areas with a brush for about 1.5 minutes I wiped it down and applied the etching mixture to the entire image for three minutes.
If you compare this final image with the image from my first etch you can see a good difference in the value. Now the plate is ready to be inked for printing.
JOURNAL 2013
Posted: October 8, 2013 Filed under: Home Studio, JOURNAL 2013, October 8 | Tags: Linda Rzoska, litho, Lithography, Ninth Wave Studio Leave a commentHome Studio: October 8th
Many things have happened since my last post, ART PRIZE has concluded, I’m progressing in the KIA Lithography class, there was a fantastic turnout for the October Art Hop Group Exhibit at the Ninth Wave Studio, there is an article in KVCC’s online publication “Insight” about my Art Prize entry as well as what I’m doing in my studio during my alternate schedule time away from teaching, there was a photography session in the studio yesterday for an upcoming article about Ninth Wave Studio by Southwest Michigan Second Wave Media, and now I’m doing the coordination efforts needed for the December 6th Group Exhibit.
It appears that Tuesday is the day for me to catch up on the marketing/communication aspect of my life an as artist. Today I spent the morning adding images of my artwork to my Artsicle site, communicated with an artist who inquired about exhibiting her work at Ninth Wave, wrote up guidelines for artwork submission to the gallery at Ninth Wave, sent out a “call for entries” for the December 6th Group Exhibit, downloaded and edited photos to include in this blog, as well as Ninth Wave Studio’s Facebook page. Soon I will post photos of the Group Exhibit that opened during the October 6th Art Hop.
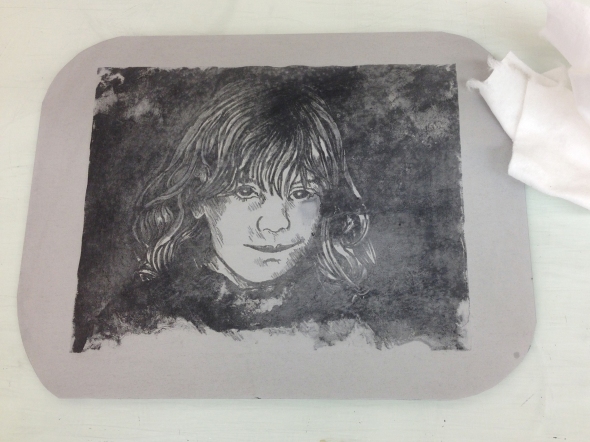
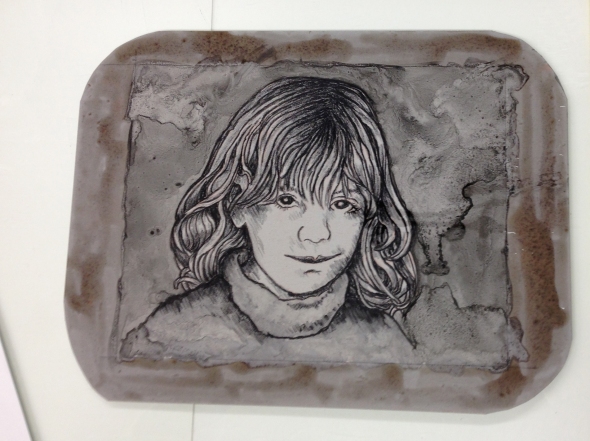
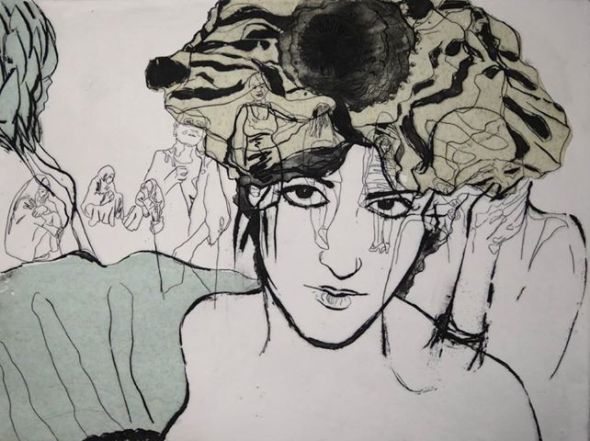
In my last post I communicated my doubtfulness of my ability to effectively draw with a litho pencil/crayon. The photo above is my final drawing with a litho pencil on the aluminum plate –I’m fairly happy with the way it turned out. The wash in the background is tusche painted on and thinned with water.
It was time to start the procedure of the “first etch” which is a multistep process that involves multiple applications of Talc, Gum Arabic, Tannic Acid, and Water while buffing in between with cheesecloth. Much more complex than what I’m used to doing with Dry Point Engraving.
After the “first etch” is the “roll-up” step where you remove the drawn and painted image to reveal the actual etch. This takes an application of Lithotine, Asphaltum, and Water and you also need to accomplish a preparation of the ink and roller.
After the drawn image has been removed an application of ink is rolled on to the plate in six or seven different applications while wiping with a damp sponge in between applications.
My instructor was surprised that my etch rolled up so dark, she thought it may have to do with the ratio of the mixture of Gum Arabic and Tannic Acid I used to etch the plate. The instructor suggested I use a ratio of 1 to 1 which I did. After seeing the results she is wondering if I should have used a ratio of 2 to 1 or 3 to 1 (Tannic Acid to Gun Arabic).
I should mention that right before I was going to Talc the plate someone set a bowl of water down on the table and the water splashed out on my plate. You can see the results of that on the photograph above. There is a black blob below the right eye of the image that extends into the hair. That is from the water splash. The instructor will be showing me a way to try to lighten that up before I start the procedure of the “second etch”.
JOURNAL 2013
Posted: September 28, 2013 Filed under: Home Studio, JOURNAL 2013, September 28 | Tags: Autographic Ink, Drawings, Linda Rzoska, litho, Lithography, Ninth Wave Studio, Tucshe Leave a commentHome Studio: September 28th
I am nearing the end of the first month of my alternate teaching schedule with KVCC. The alternate teaching schedule is allowing me to not teach the fall semester. I have been working only on art related things – which is really wonderful. One thing that has surprised me, though, is the time I must spend doing marketing, communications and networking. I usually do this in the early morning and sometimes in the evening. Regarding the marketing of my work, I have been fortunate to find an online source for a web gallery to sell my work, Artsicle. Again I am surprised at how much time and effort it actually takes to do what is needed to make the web gallery functional. It is an ongoing process. This is the link to my site:
http://open.artsicle.com/Linda-Rzoska
I also have joined Linkedin and have been able to reconnect with many individuals I worked with before I started teaching at KVCC.
I’m enrolled in a Lithography class at the Kalamazoo Institute of Arts (KIA) and really enjoying it. The class size is very small, only 5 students, and the printmaking lab is great. The KIA is only a couple blocks from my own studio which makes it easy to get to. The lab is available anytime I want to walk over and work.
In order to make the best use my time in this class I have been researching the look and feel of black lines drawn with a litho crayon. From my research I realized early on that I needed to learn to simplify my line work for my lithography class . . .
So far I have found that I surprisingly like drawing with a litho pencil on my aluminum plates. I have finished one drawing and will be printing it during the next class session . . . we’ll see how it turns out. I’m well prepared for a steep learning curve. While researching I came across this . . .
Learning curve of drawing with a litho crayon . . .
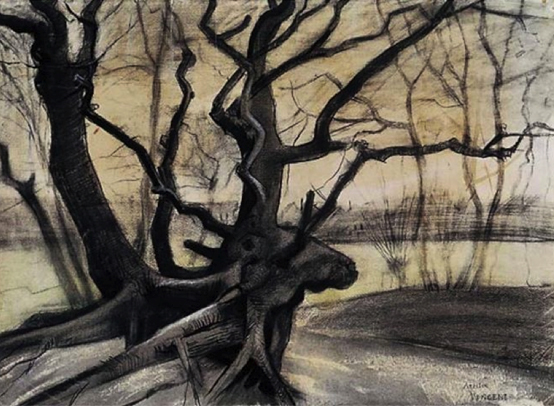
This info from Van Gogh’s letter to his brother Theo:
When I made the lithographs, it struck me that the lithographic crayon was very pleasant material, and l thought, I’ll make drawings with it.
However, there is one drawback which you will understand – as it is greasy, it cannot be erased in the usual way; working with it on paper, one even loses the only thing with which one can erase on the stone itself, namely the scraper – which cannot be used strongly enough on the paper because it cuts through it.
But it occurred to me to make a drawing first with carpenter’s pencil and then to work in and over it with lithographic crayon, which (because of the greasiness of the material) fixes the pencil, a thing ordinary crayon does not do, or, at least, does very badly. After doing a sketch in this way, one can, with a firm hand, use the lithographic crayon where it is necessary, without much hesitation or erasing. So I finished my drawings pretty well in pencil, indeed, as much as possible. Then I fixed them, and dulled them with milk. And then I worked it up again with lithographic crayon where the deepest tones were, retouched them here and there with a brush or pen, with lampblack, and worked in the lighter parts with white body colour.
Below are my attempts at drawings that will be suitable for lithography:
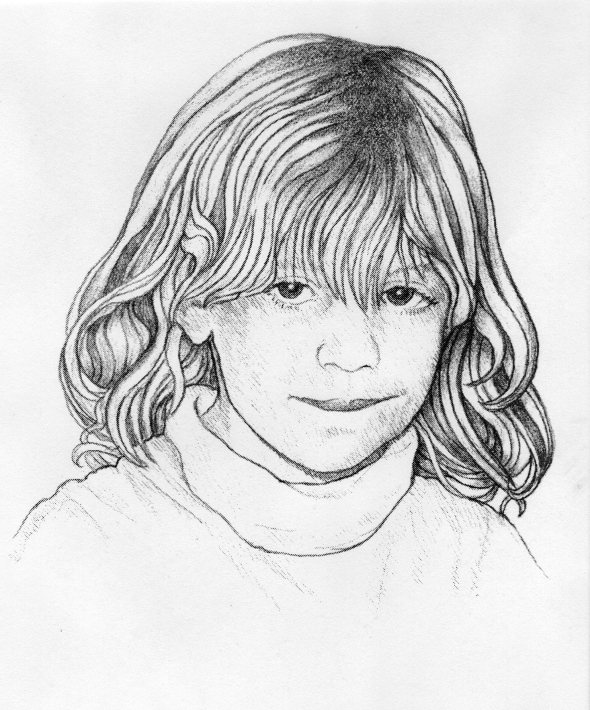
This is a pencil drawing I produced many years ago, I have redrawn it on an aluminum plate with litho pencils and have added a tusche wash in the background. I’ll try to remember to take a photo of the plate before it is etched and printed so I can post it on this blog.
This is an ink drawing purposely made very linear. My desire is to recreate this on an aluminum plate with autographic ink and tusche. I doubt if I will be able to reproduce all of the line work on the aluminum plate. I, also, intend to use this image for a dry point engraving I will be doing,
This drawing started out being very linear, as you see it started out as a graphite drawing. I then thought I would do an ink version . . . I got a little carried away and started to add a lot of value (see image below). When I showed it to my litho instructor she commented that it could still make a good litho if I reproduced it with autographic ink on a litho stone instead of an aluminum plate.
I continued with the drawing and I feel I have reached the point of no return (see below). There is so much value that it would take hours to reproduce this onto a plate with autographic ink. I literally would have to redraw the complete drawing on the litho stone. I’m thinking I will try to do a litho based off the first graphite drawing.
I will continue to finished this value drawing but I will probably use it for something other than lithography. When doing the drawing I was very happy with the variations of texture I was able to get.


